Expressio: Emote Through the Mask
Design
•
Engineering
•
Coursework
12
–
4,
2021
Below are the process notes for my open design project in Mechanical Synthesis (MAE 2250) at Cornell. The assignment was to design a product, working in groups of three to four people, for one of two user types: new parents or essential workers.
Initial Brainstorm
To start the project, I joined my teammates Callen and Felipe to brainstorm ideas intended for each user type. We wrote down every idea, no matter how silly it might have seemed, because silly ideas can seed good ones. Here’s what we came up with:
New Parents
Baby feeder
Baby vital notifications
Baby luller
Hoverboard stroller
Motorized stroller
Tiny stroller (maneuverable)
Parent luller (help sleep despite baby?)
Rocket-powered stroller
Stroller that also functions as a crib
Bins to organize stuff
Essential Workers
A device that cleans face shields
Something that keeps masks from touching your mouth
A mask without a strap?
A hamster ball for a human
A way to get better payment / time off?
Mask for people with beards
A mask cleaner (not washer, easy to use)
Shower for sanitization
Portable sanitation shower
A friendly mask
A hoodie with a built in mask so you never forget it?
A way to interact via touch more safely
remote grabber?
Glove dispenser for easy donning
Cycling Mask Holder
As a preliminary direction, we chose to explore a cycling mask holder for better mask storage. We thought such a device would improve the quality of life for many kinds of essential workers, although in hindsight I think it was more of a solution for our own problems—we all have trouble organizing our reusable masks. Here are some drawings of the idea:


Two sketches for a carousel designed to help people cycle through masks in an organized manner.
User Interview
With an initial direction chosen, we moved to the user interview process. We interviewed Callen’s sister, Jenna, who works with special needs kids in a variety of settings. She had some concerns about workplace safety—mainly because the kids she works with tend to take off their masks—but her main concern was her inability to show her facial expressions and see those of her students. The interview showed that our initial direction wasn't as important as we thought, so went back to brainstorming.
Crazy Eights
In the Crazy Eights brainstorming method, we spent eight minutes creating eight sketches each, focusing on ideas that might solve Jenna’s need for better emotional communication. A few of these sketches are shown below:
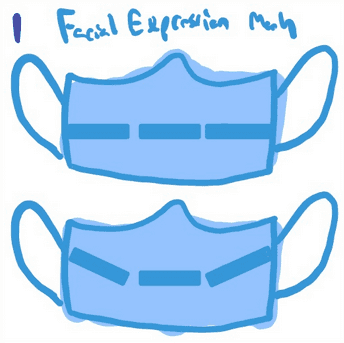
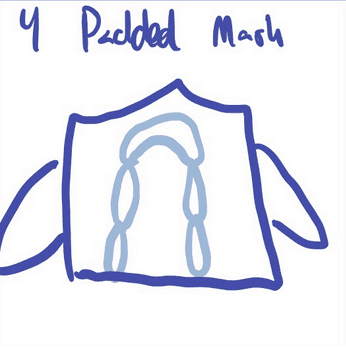


Selected Crazy Eights ideas to address the problem of poor emotional communication with special-needs students.
Selecting a Design
We narrowed our set of designs to three options: one obvious, one interesting, and one radical:
Obvious: A mask that conveys and amplifies facial expressions via bar linkages
Interesting: A “diver bubble” with air filtration
Radical: A room where masks aren’t required to keep everyone safe
From there, we generated storyboards for each of the designs:

Storyboard for option a (obvious): an expressive face mask.

Storyboard for option b (interesting): a mask designed like an astronaut or diving helmet, which allows expression though the glass.
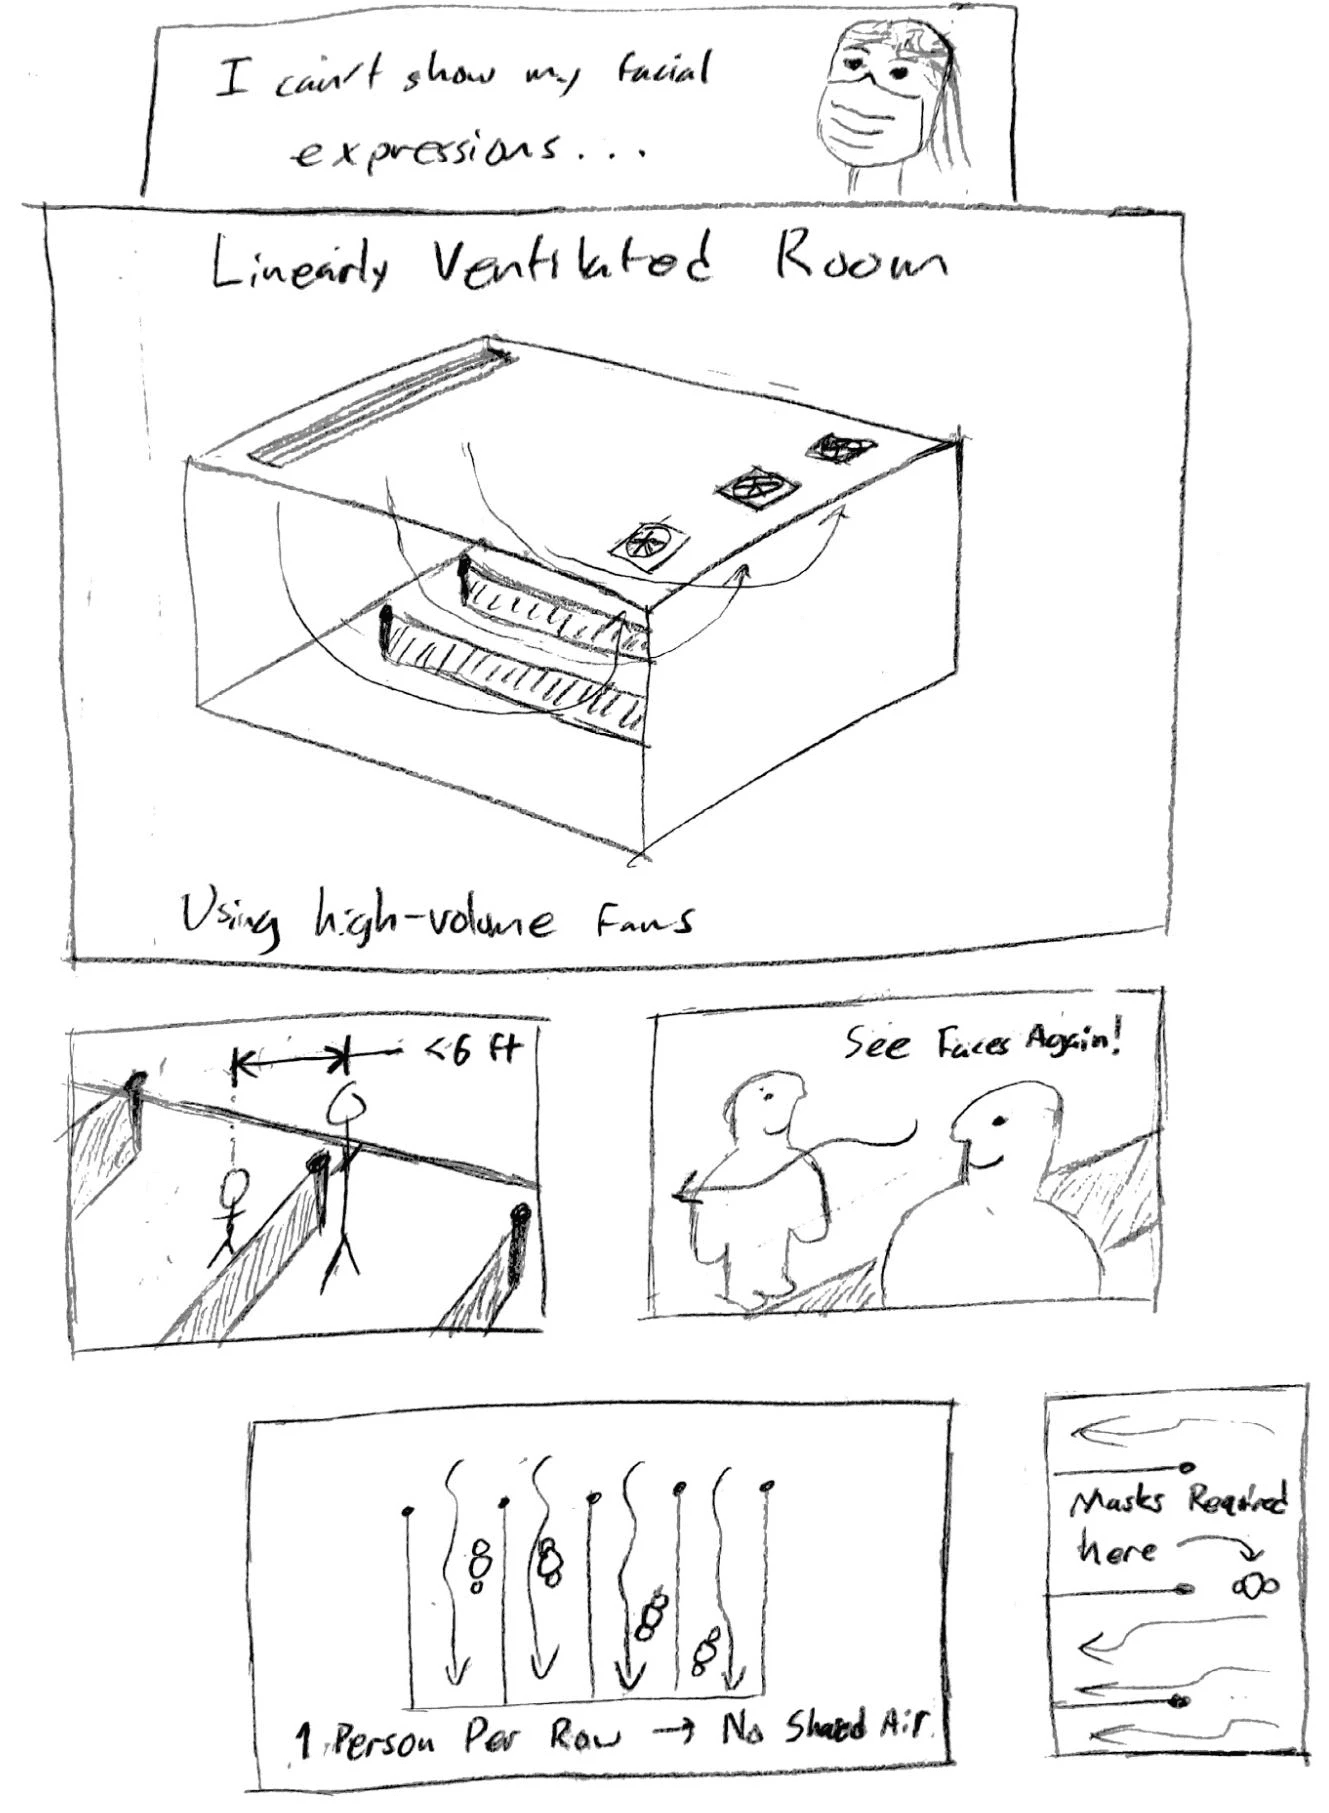
Storyboard for option c (radical): a mask-free room achieved through powerful ventilation.
Once we had finished the storyboards, we stepped back to analyze which designs would be feasible to prototype within the scope of the project. The linearly ventilated room would have yielded an uninteresting scale prototype, and we felt like the diver bubble, while interesting, would be impractical to use regularly. As such, we settled on the expressive face mask.
Making it Happen
We set out by trying to decide whether the mask would respond directly to facial movements or be hand-operated. Our first paper prototype was automatic: it attached to your cheeks and used strategic folds to achieve a smiling motion when your cheeks moved outward. There were a few problems with this: the connection between the prototype and your cheek would be hard to make, the folds failed to achieve a reliable smiling motion, and what motion there was was too small to be noticeable. After much debate, we went with a manual design.
Fleshing out the design
Our goal was to convert rotary motion on the side of the device (a handle; user input) into a change in curvature of “lips” in the front. We thought of two ways to achieve this:
Counter-Sliding Strips
This solution felt elegant. All we needed was a strip of material and a way to constrain it to slide and bend as shown below. The trouble was constraining it. While we could have designed a 3D-printed part to hold the strip, it was hard to guarantee that the “lips” would bend correctly when slid against each other.
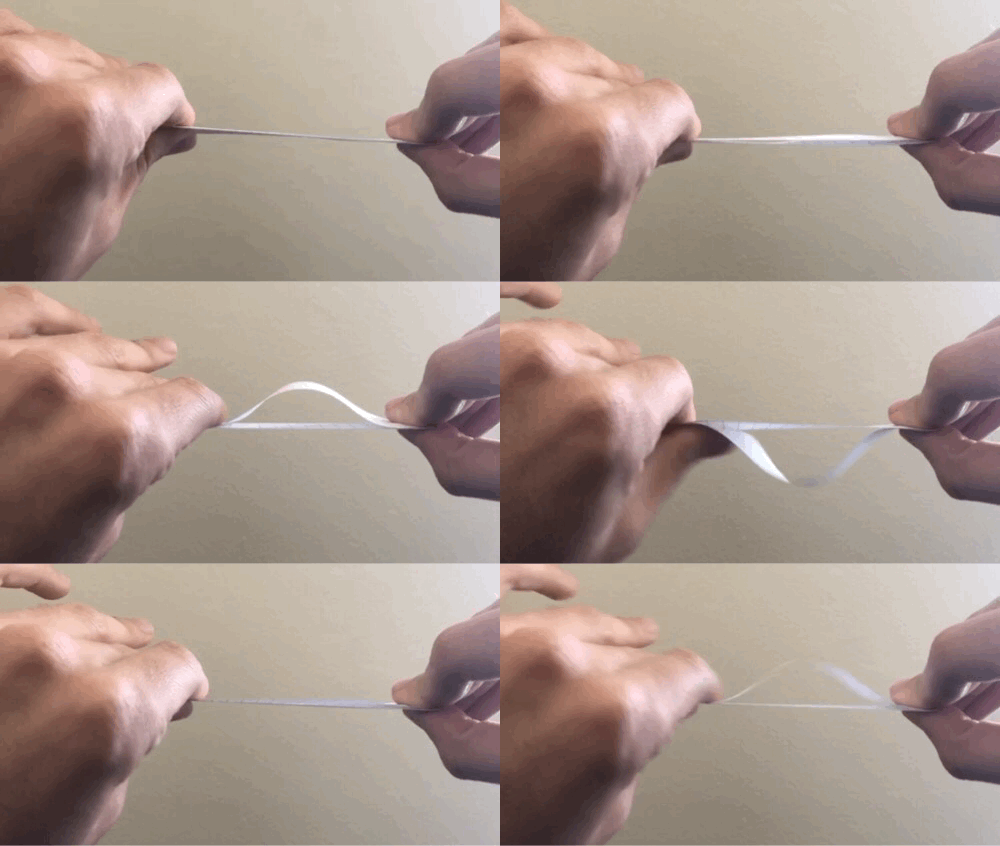
Animation of counter-sliding strips of paper, alternately forming a smile shape and a frown shape.
Elastic Band Between Pegs
An elastic band strung between two pegs and manipulated in the center seemed less elegant, but it was easier to constrain. We decided to let go of the elegance of the counter-sliding strips in favor of this more reliable and manufacturable design.
Finalizing the Design
We came up with two designs in Fusion 360 to explore our chosen method, pictured below. The first design relied on varying the distance between the two pegs, allowing gravity to bend the band into a smile. The second design relied on moving a central peg up or down to yield a frown or a smile, respectively.


CAD Mockups. Design 1 (left): a gravity-assisted system, creating a smile when opposing pegs were moved closer to each other. Design 2 (right): a central peg moves up or down to bend an elastic band into a frown or a smile, respectively.
We chose to move forward with the second design, even though it would create a sharp corner in the center, because it had fewer moving parts.
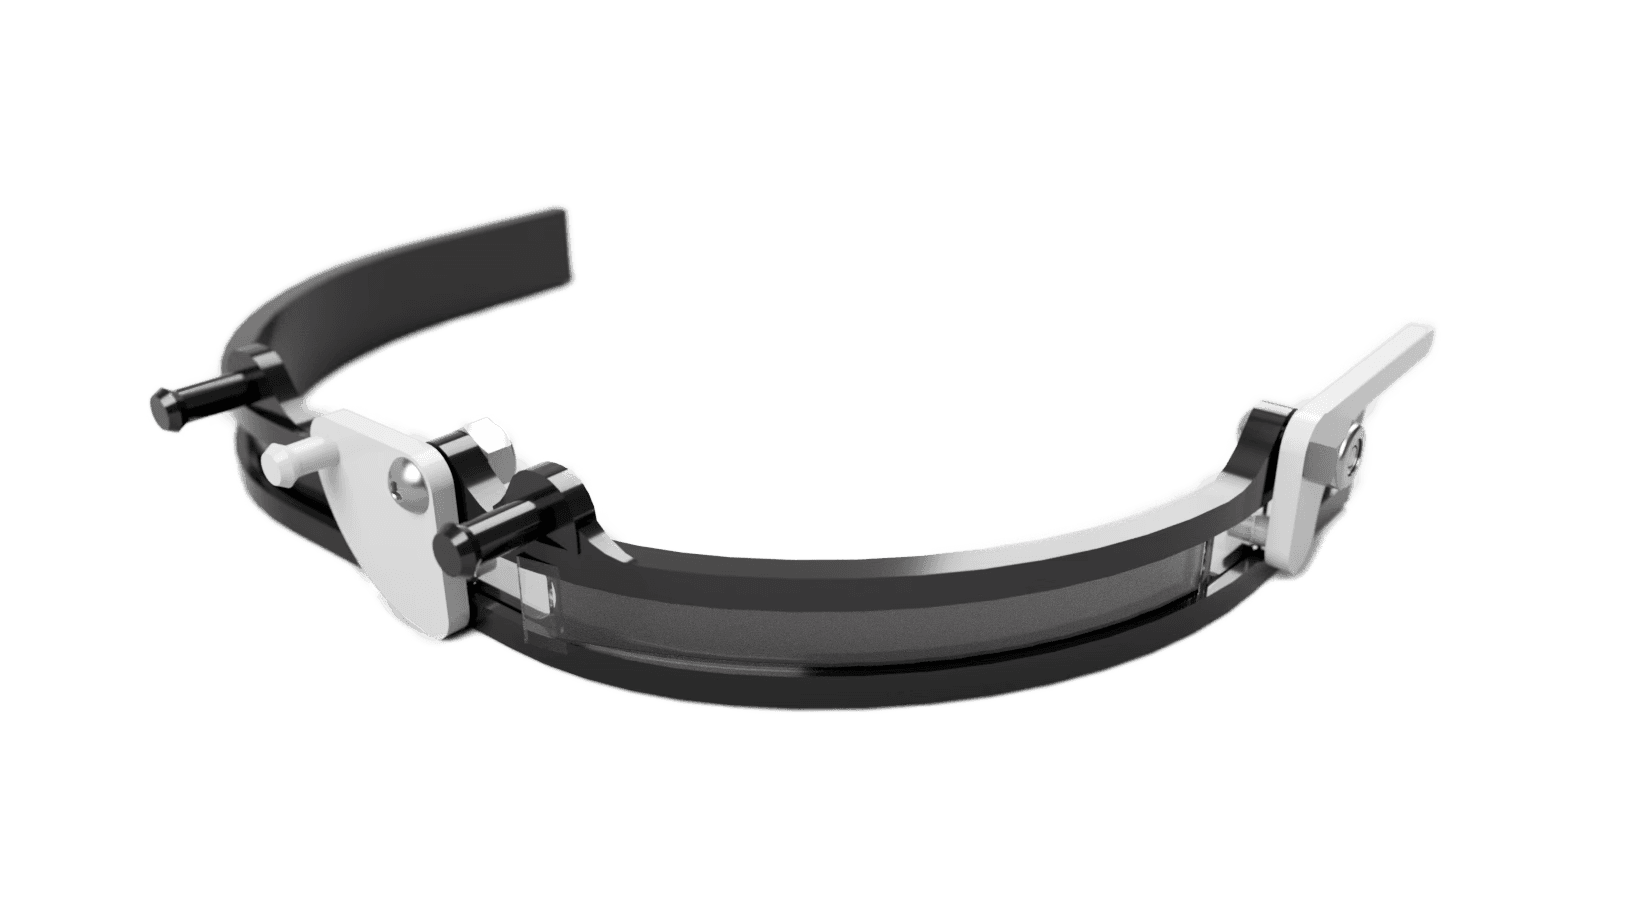
To transfer motion from the side lever to the front piece, we used a thin plastic film (office transparency left over from face shield manufacturing in the Cornell Maker Club’s mechanical lab) with slots laser-cut in it. It slides in a groove in the 3D-printed part (black) to redirect linear motion around the curve of the mask. Both white pieces are attached with M3 screws and nuts, and they transfer their rotational motion to linear motion via scotch-yoke mechanisms (pins in the slots in the transparency).
Manufacturing
We used the Maker Club’s 3D printers and laser cutter rather than relying on the Rapid Prototyping Lab, because we were somewhat late getting to the manufacturing process and needed to iterate quickly. We printed three iterations of the parts. The first had tolerance issues with the slot and had no clips to attach it to the mask; the second fixed those tolerance issues and increased the travel of the smile by adjusting the front lever; and the third fit perfectly—it was polished and playful to appeal to kids. Below you can see the final render and a comparison of the two latest iterations (V2 at left, V3 at right).

Final render of the CAD model of V3.

Two manufactured versions of Expressio: V2 at left, V3 at right.
Finally, we made a product thumbnail to solidify our brand:

Product thumbnail for Expressio.
Future steps would have included making the frame camouflage better with the mask, reducing overall weight, and experimenting with other materials for the smile, to name a few.

