
Gigging Platform
Design
•
Music
•
Engineering
23
, 2022
–
16,
2024
In the summer of 2022, I got serious about my setup for playing live shows. I had been finding myself in need of multiple keyboard stands and tables in order to set up the following gear:
My laptop, where all of my sounds lived
An audio interface to enable low-latency use of the laptop
My two Roli Seaboard Blocks
A more standard MIDI controller with a keyboard, knobs, faders, and drum pads
I wanted to create a rig that would wrap up all those jobs into one: it needed to replace the tables I had been relying on and speed up my setup times.
Building It
Based on those requirements, I designed a box in Fusion 360. I made space for two 1U rack units, side by side, and inserted placeholder objects for my laptop, my Seaboards, and my 1U audio interface. I angled the top surface to give better ergonomics, and I gave the design a space-age aesthetic with clean lines and angled surfaces. Finally, I designed the bottom panel to be removable so I could make changes to the internals more easily.
From there, I made drawings of each part and got to work on the carpentry. I made four wall struts, connected them with a brace, and cut some plywood to shape for the top and bottom plates. I made a jig for the table saw to cut the walls at a consistent angle:

The jig I made for cutting the walls at a consistent angle on the table saw.
Once all the parts were cut, I made a mockup assembly to see how things were shaping up.


A mockup assembly of the wood parts before gluing.
Before committing to the positions of the four walls, I decided to check the fit of my audio interface in the slot I'd designed for it. The fit was pretty much perfect.


Checking the fit of my audio interface between the first two walls. After this fit check, I researched the specifications for rack-mount units and discovered that the space between walls should be 19 inches — not necessarily the width of the audio interface.
However, I wanted this gigging platform to work with any audio interface or rack-mount device, so I double checked the requirements for rack-mount slots. I'm glad I did, because the space between walls needed to be 19 inches for proper mounting — not the width of the audio interface. It turned out that I'd cut the top and bottom plates to just the right length for that, though. Spontaneous perfection!
Since the wood was just about ready to glue, I did a bit of paint shopping. I wanted the outside to be dark gray to be versatile in many lighting scenarios, but I wanted to give the design a pop of color, too. So after playing around with colors in CAD, I decided use blue paint on the inner faces of the top and bottom plates.
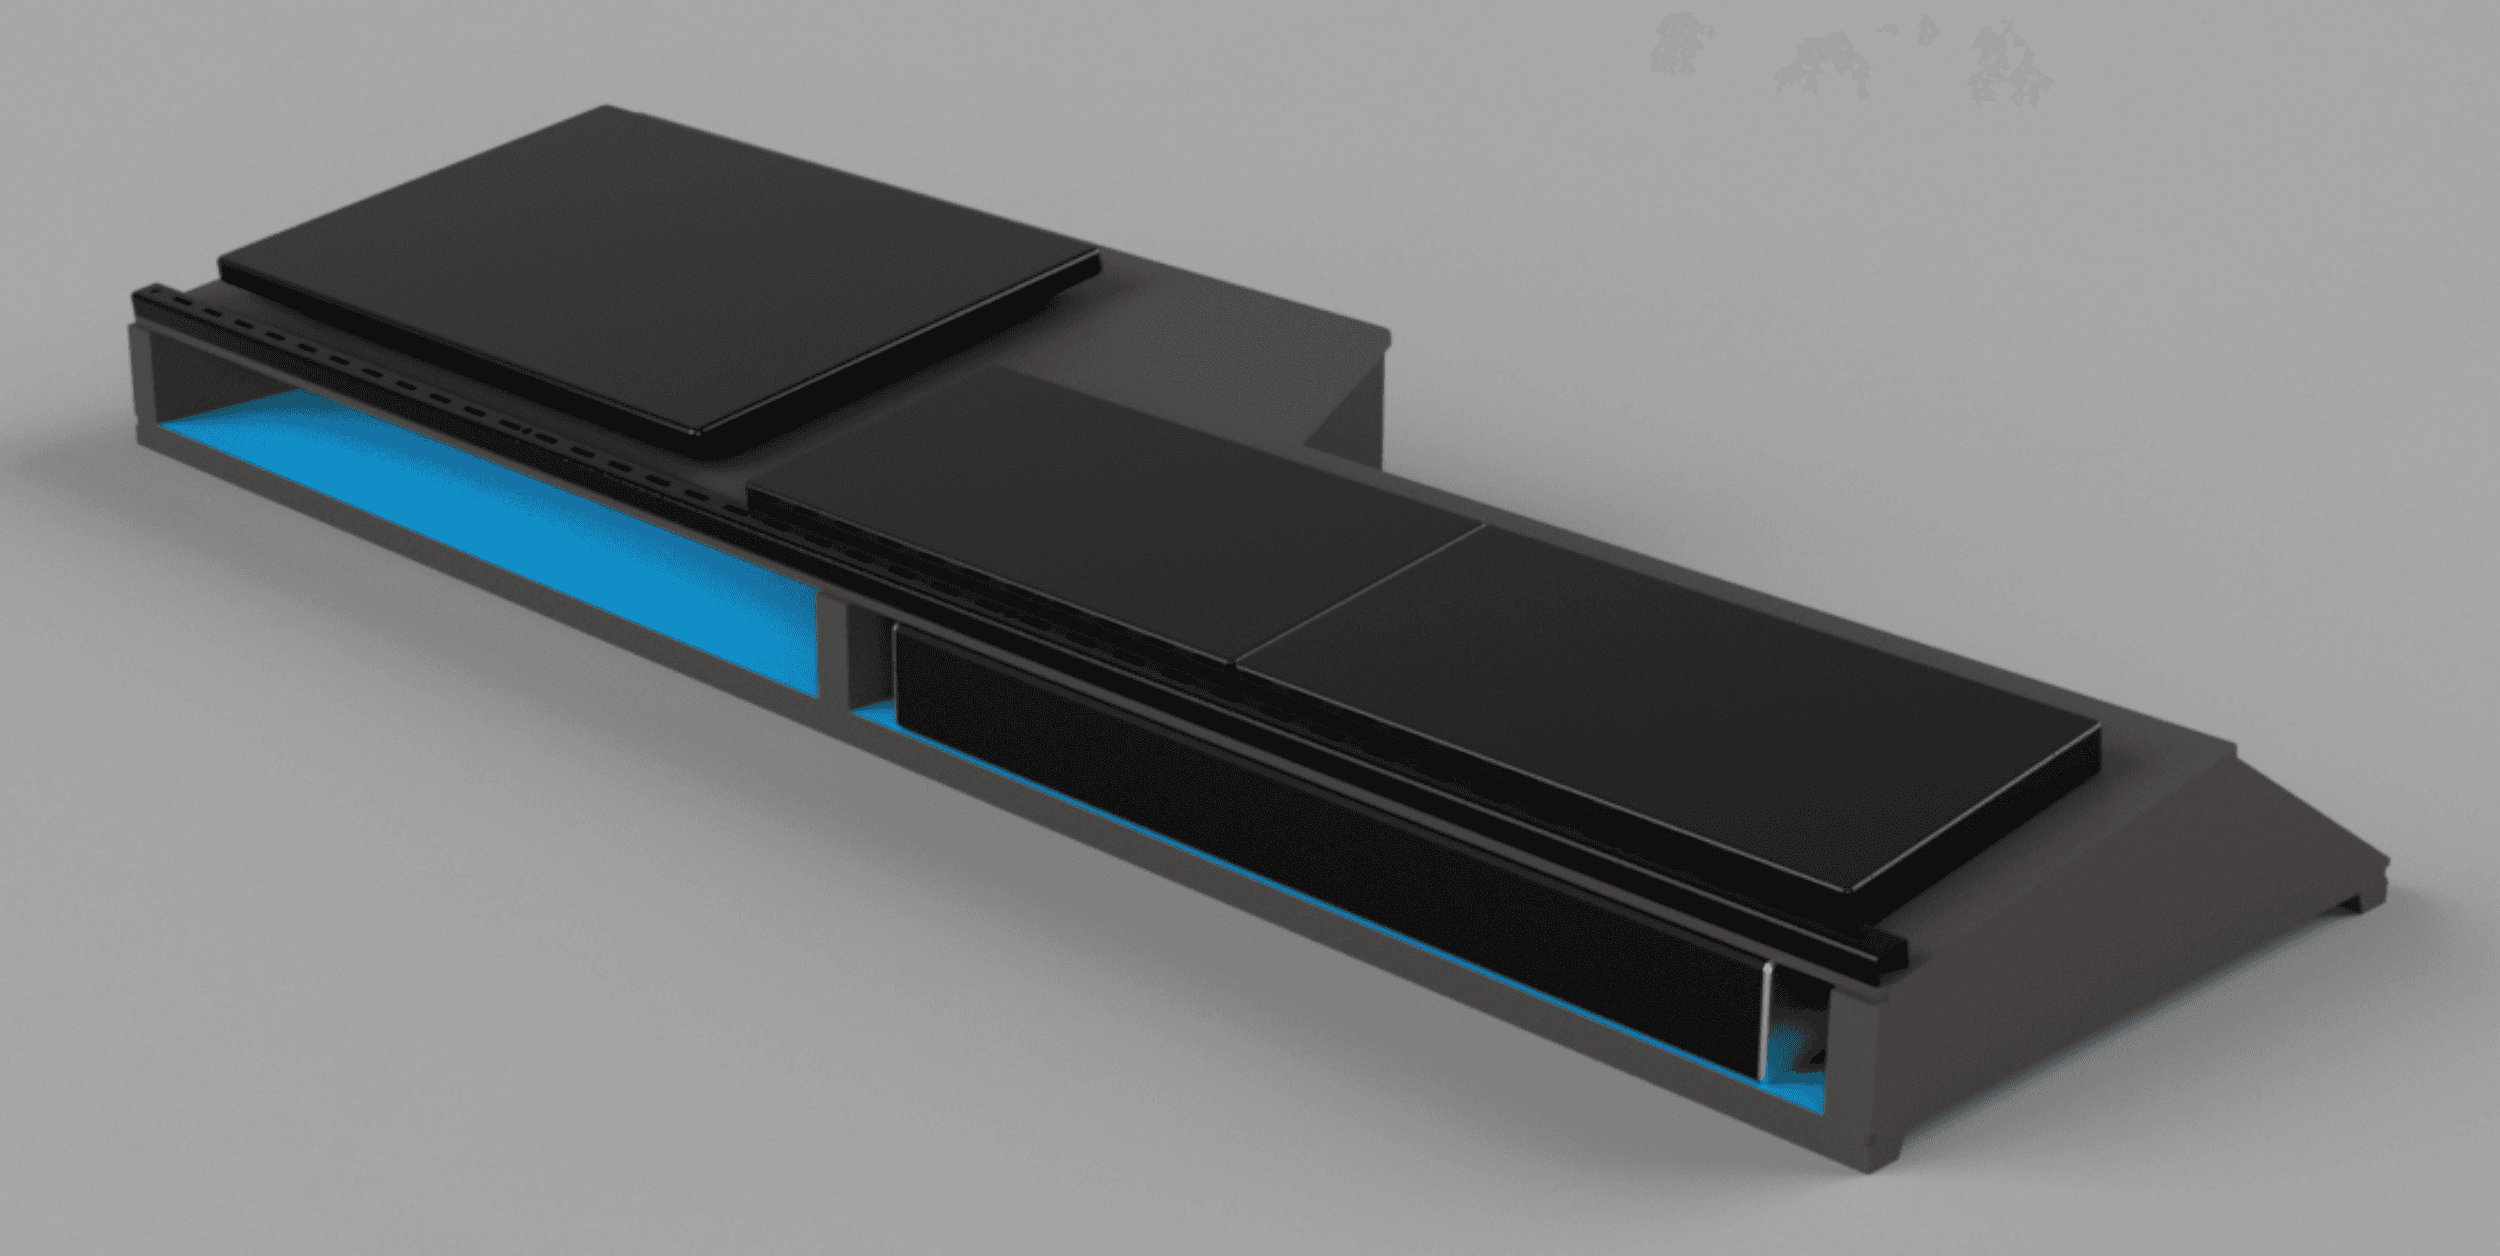
Final rendering of the CAD model for for the gigging platform, showcasing the dark gray body with blue accents.
I managed to find pretty close matches to those colors when I went paint shopping:


The paint colors I chose. I wanted the blue to pop against the dark gray, and I wanted the black elements (instruments and computer) to have a little bit of contrast against the gray.
Then it was time to glue together the final assembly so that I could paint it. I stapled some rails to the bottom plate, mainly to provide more wood to screw into: a total of nine screws would pass through the plate and bite into the walls for secure-but-removable mounting. These rails also added a little bit of stiffness and better-defined contact points for a more stable fit on keyboard stands.


The full assembly, turned upside down for a fit check of the rails on the bottom plate. These rails were designed to stiffen the plate and provide better-defined contact points for a more stable fit on keyboard stands, while also strengthening the joints for screws attaching the bottom plate to the rest of the frame..
Then it was time for a coat of primer. Once that dried, I tried putting my laptop and Seaboards on top:

The upper frame of the gigging platform, with my laptop and Seaboards placed on top. In the background, the bottom plate has just received its coat of blue paint.
Then I painted the upper frame:


Painting the upper frame. I'm particularly proud of the blue peeking through the slots of the metal rail.
Using It
Once the paint dried, I was off to college with my new creation. I set it up in my apartment and got this picture of the finished product, mounted on a two-tier keyboard stand:

The first version of the gigging platform, set up in my apartment.
This setup allowed me to practice and perform on a consistent setup, rather than rearranging everything based on what kind of tables were available at the venue. The platform and my upper-tier keyboard both packed neatly into a keyboard case, and the tower looked great on stage:

The gigging platform and upper-tier keyboard packed into the keyboard case, upper left, with the rest of my band's gear.


The gigging platform at one of its first gigs (The Fuse at CU Downtown, in Ithaca, NY, Sep 10, 2022). You can listen to that set on SoundCloud.

The gigging platform really feels at home on a nighttime stage with lights. Show: The Fuse at Deep Dive Ithaca, Oct 21, 2022.
Improving Ergonomics
One of the first things I discovered was that the top surface of the platform was tilted the wrong way, given that the platform sat on the lower tier of the keyboard stand. The tilt was making my wrists have to bend more, not less, in order to play the Seaboards.
Fix #1
My first fix was quick and dirty. I had some conduit pipe lying around, so I cut a length that matched the Seaboards, wrapped it in gaff tape, mounted it to the existing metal rail, and set the seaboards on top of it.

The seaboards resting on the conduit pipe to improve their angle slightly.
Fix #2
The second fix I tried was more drastic: I moved the platform to the top tier. This also offered the advantage that I no longer had to bend over to see my laptop's screen. I had originally imagined putting the platform on the upper tier, but it didn't fit on the stand's shorter support arms. What I realized, though, was that I could cut a notch in the back of the platform to let it wrap around the stand's central column. That's what I did:

A wide notch allows the gigging platform to wrap around the stand's central column. A smaller notch allows cables to pass under the central wall.
This modification allowed me to use a heavier, bigger, weighted-action keyboard on the lower tier. I liked where this was going, because it made the seaboards and my computer more visible.

The gigging platform on the upper tier, with an 88-key controller on the lower tier.
However, a few things started to annoy me about this setup:
The lower-tier keyboard could really only be a keyboard. To expose the controls on the top of the keyboard, I'd have to move it too far towards myself and make it hard to reach the seaboards.
The headphone output and front mic inputs of the audio interface were in a bad spot. The cables would get in the way of the lower keyboard.
The laptop would obscure my upper body during a show.
The lower-tier keyboard ended up at a bad angle for my wrists.
As a result, I eventually came up with another fix.
Fix #3
I brought the platform back down to the second level, but this time I flipped it around: now the top surface sloped away from me. This gave me a much better wrist angle for playing the seaboard, and it still let me use all the knobs and faders on the upper keyboard. As a bonus, it was now easier for the audience to see what I was doing with the seaboard.
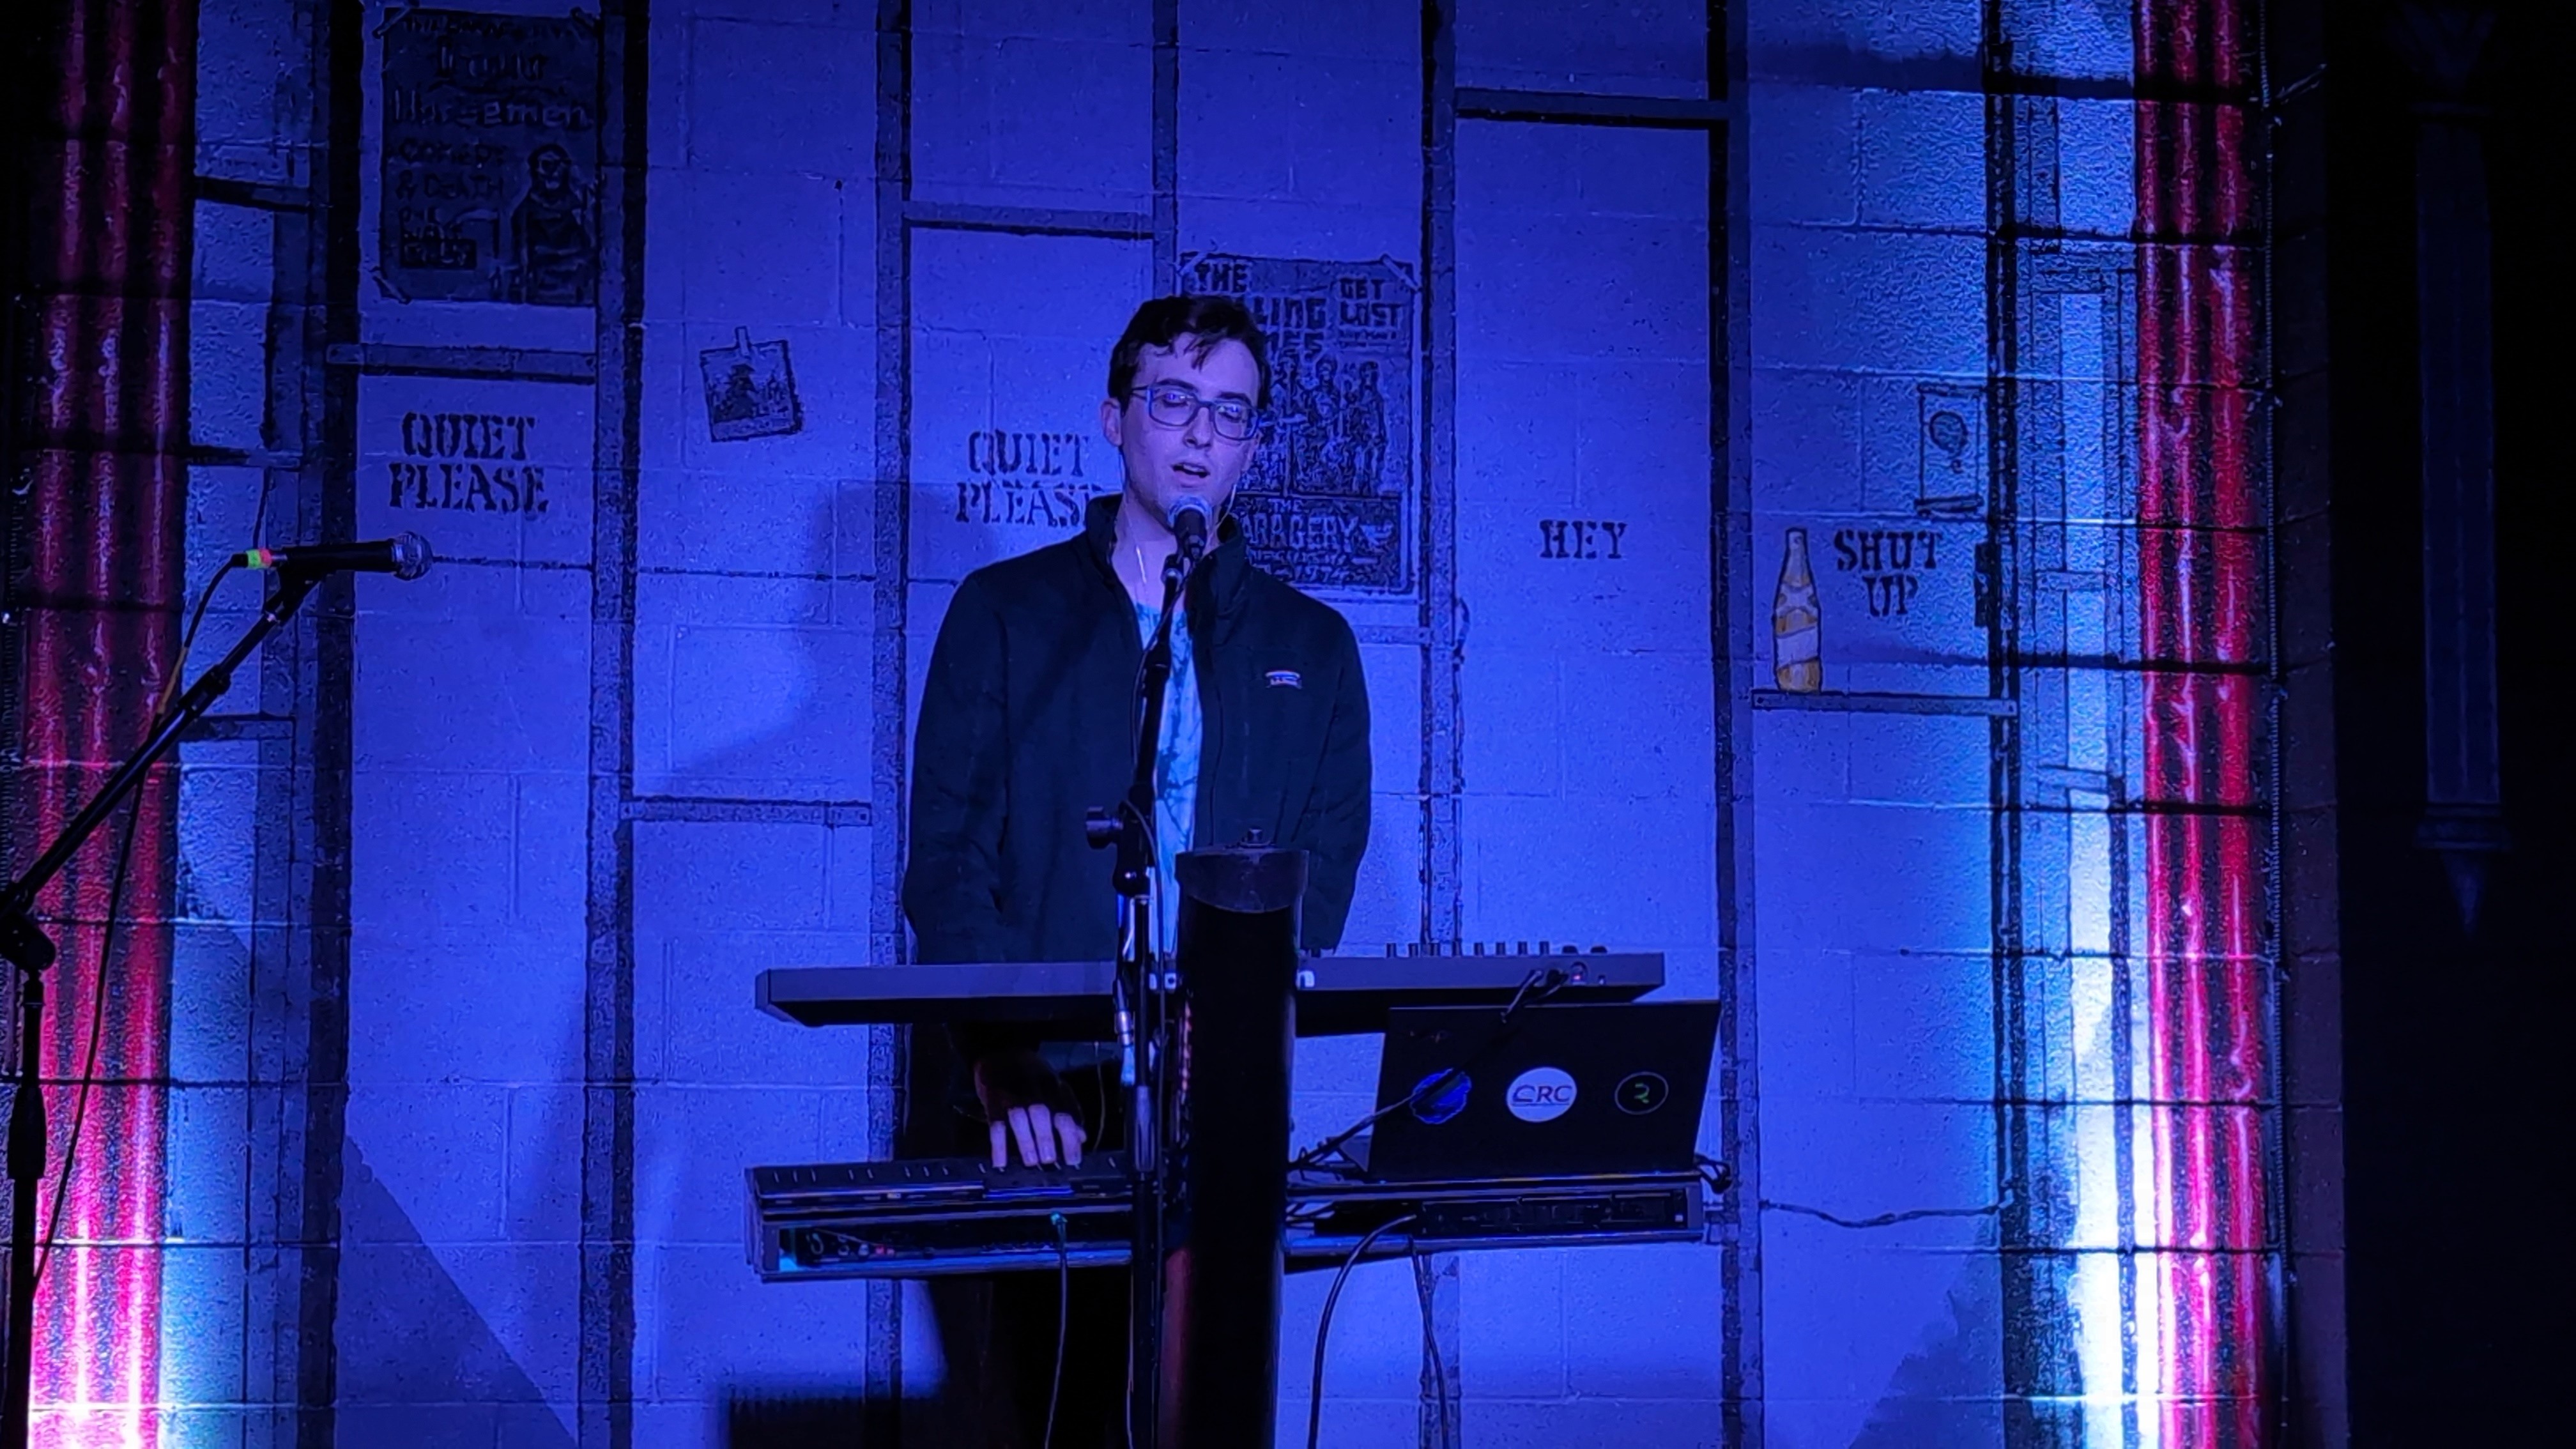
Fix #3 in action at the Saranac Lake Hootenanny, Sep 16, 2024.
This is still the configuration I use as of writing this on July 1, 2026.

The Gigging Platform waiting on stage before my May 23, 2026 show at the Upper Jay Art Center and Recovery Lounge.
Looking Ahead
I want to find a way to make a more airy stage look, and I also want to incorporate more controllers (for example, an Akai APC40). I think that'll require a design that fits more on a single tier.
